

Photo by Mehmet Ali Peker on Unsplash
Simplify Multi-Service Docker Access in AWS: A Guide to Load Balancing and Route53 Subdomains


Table of contents


No headings in the article.
During a recent standup meeting in my internship, a stimulating conversation arose regarding the scalability of Docker services running on a single instance. The goal was to enhance their resilience and performance by distributing them across multiple instances, facilitated by a load balancer, and making them accessible through subdomains of our company's domain. Motivated by this discussion, I embarked on a research journey to delve into the intricacies of this task. After conducting successful research and implementation, I'm excited to share my findings and guide on achieving this Docker orchestration in an upcoming article.
The primary objective of this article is to demonstrate how Docker services running across multiple instances can be efficiently organized into target groups based on their respective ports. Subsequently, these target groups are linked to a load balancer, resulting in each service becoming accessible by appending the Docker service port to the load balancer's URL. While this approach is technically sound, the resulting URLs may lack user-friendliness. To address this, we'll leverage AWS Route53's A-records to establish subdomains for these docker services. However, integrating the load balancer's URL and service port directly into the A-record doesn't do the trick. To make this possible, we'll employ a CloudFront distribution, creating a URL that points to the load balancer's URL and service port. This CloudFront URL will then be integrated into Route53's A-record configuration. This article promises an engaging exploration of the process, so let's dive right in.
This article does not cover the deployment of Docker applications on EC2 instances. It assumes that your applications are already deployed and accessible via the instance's public IP address with the appropriate port appended, as demonstrated below;

For this article, I'm employing two EC2 instances to illustrate the process. These instances host two Docker applications accessible via ports 8080 and 8081.
Our initial step involves creating Target Groups for these applications. Specifically, I will establish two separate target groups—one for each port that I intend to access. You can find Target Groups in the AWS console under the EC2 resources section.
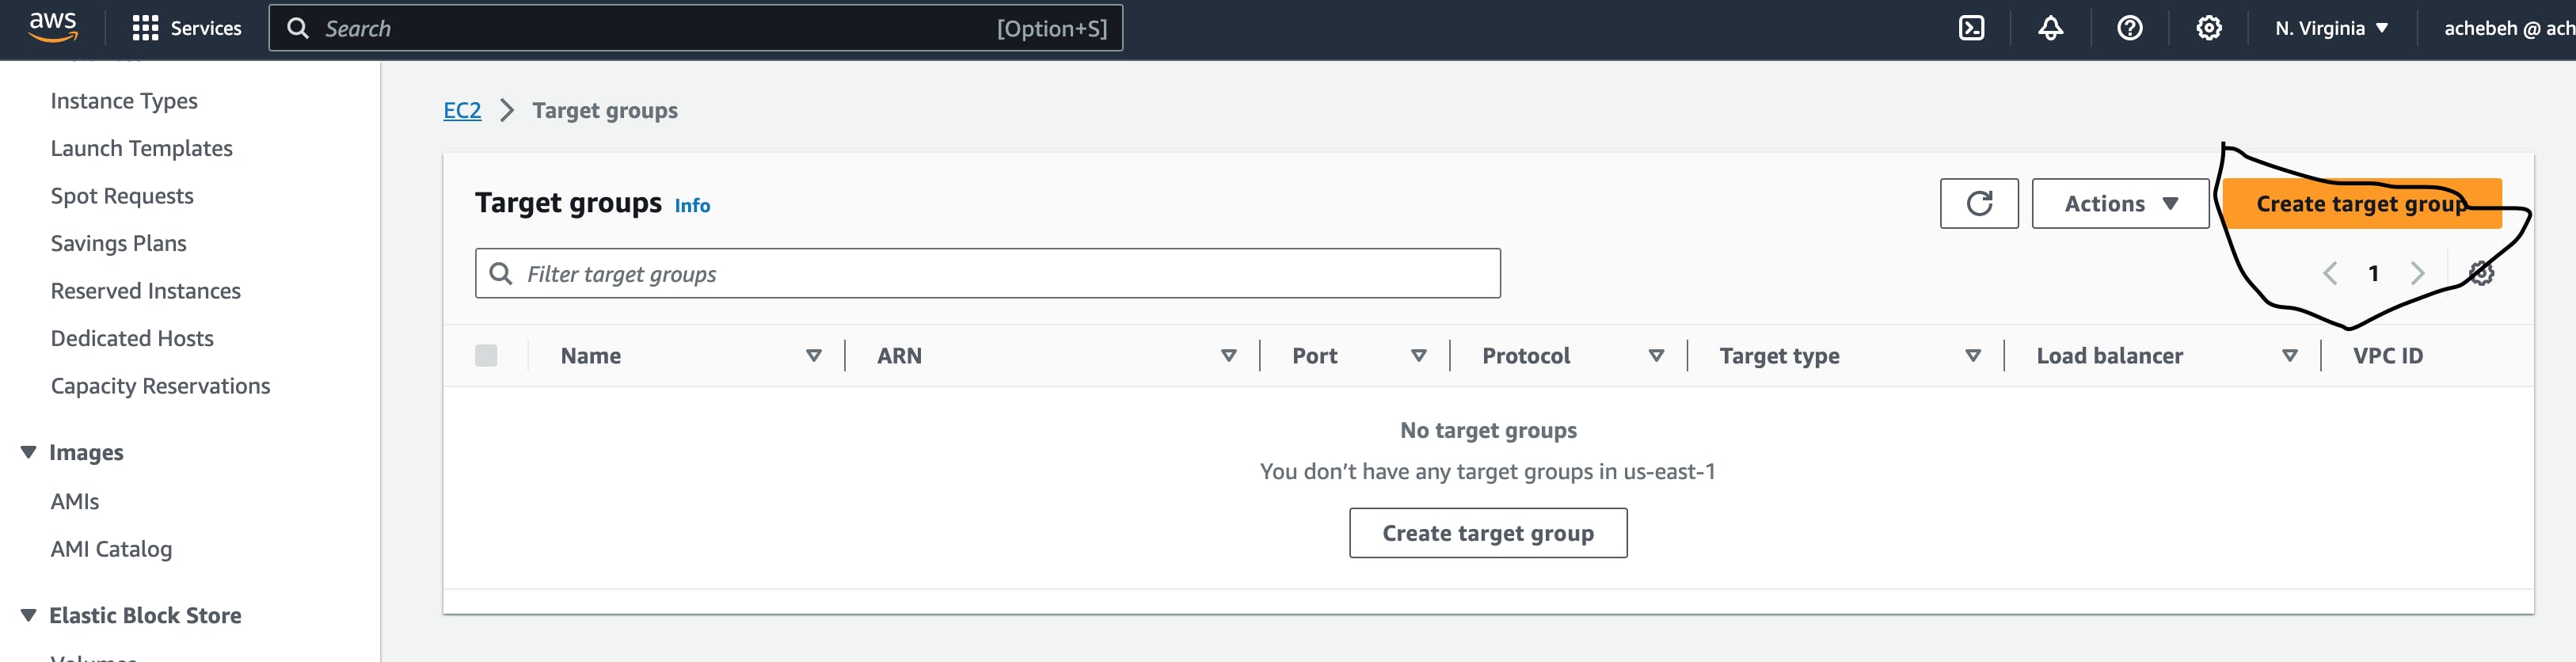
For the first target group;
Begin by selecting "Create target group."
Choose "IP addresses" as the target type, as our focus is on the IP addresses of the created instances.
Input Target group name
Select Protocol and Port. For the test case, I utilized HTTP and 80 as protocol and port respectively.
Select VPC where the instances are located.
Register the private IP that will be attached to the target.
Choose the port within the IP addresses where the service should be reachable. In this case, set the port to 8080 for the first target group.
Include the IPs and port as pending targets.
Finally, create the target group.


Repeat the above steps to create the second target group. You should have something similar.

Now that we've successfully created our target groups, let's proceed to the next step: attaching these target groups to a load balancer. I appreciate your continued engagement.
You can locate the load balancer resource on the EC2 page. To set up a load balancer.
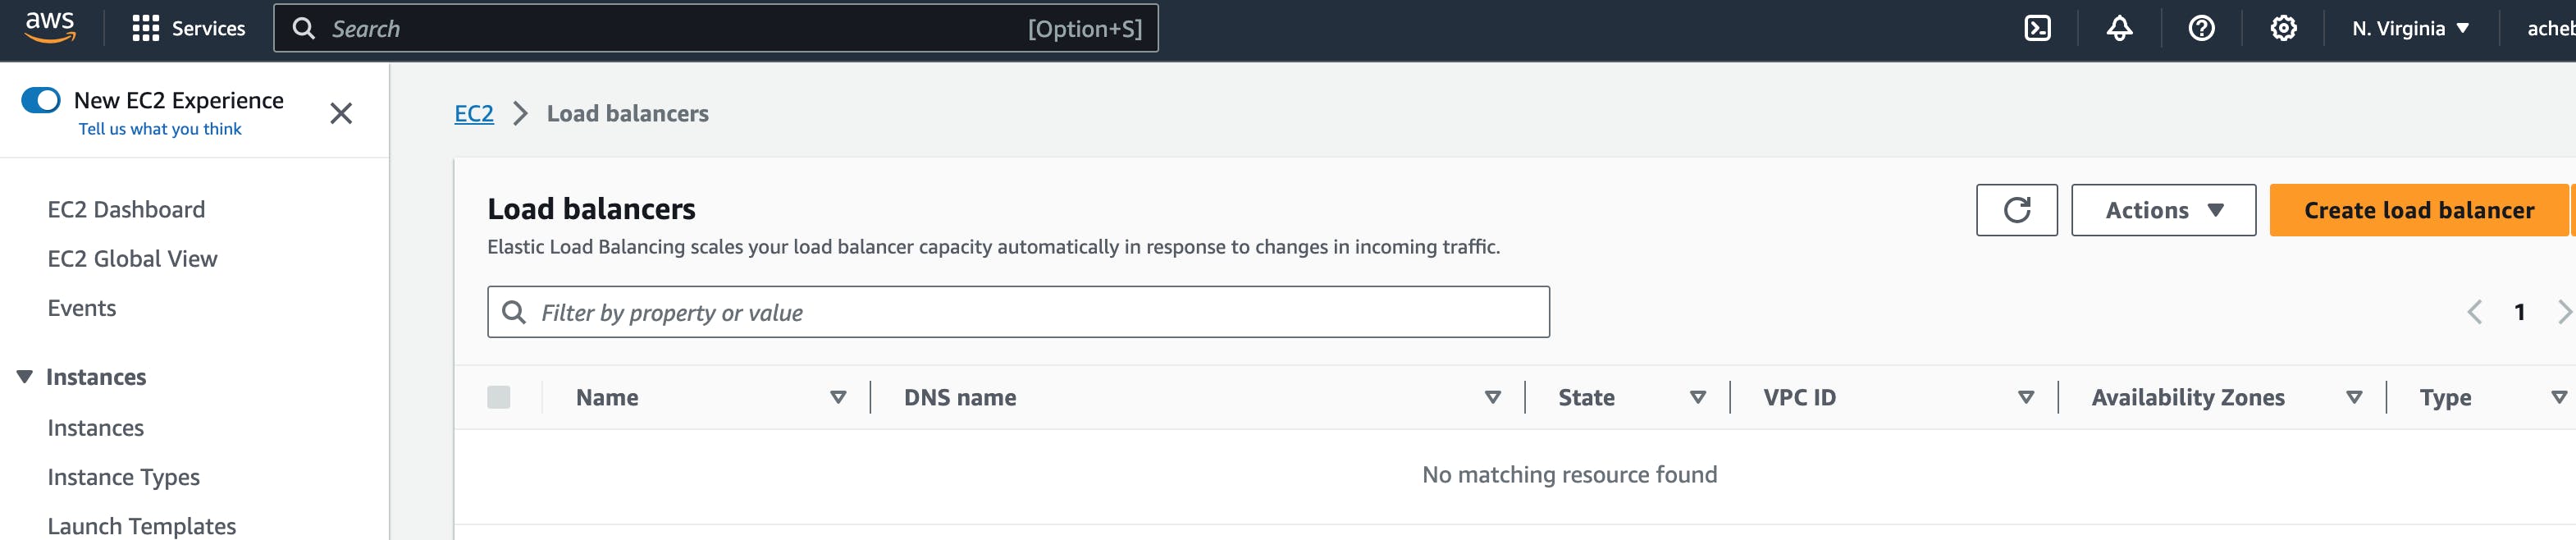
Begin by clicking on "Create load balancer".
Select "Application Load Balancer".
Provide a name for your load balancer.
Select "Internet facing".
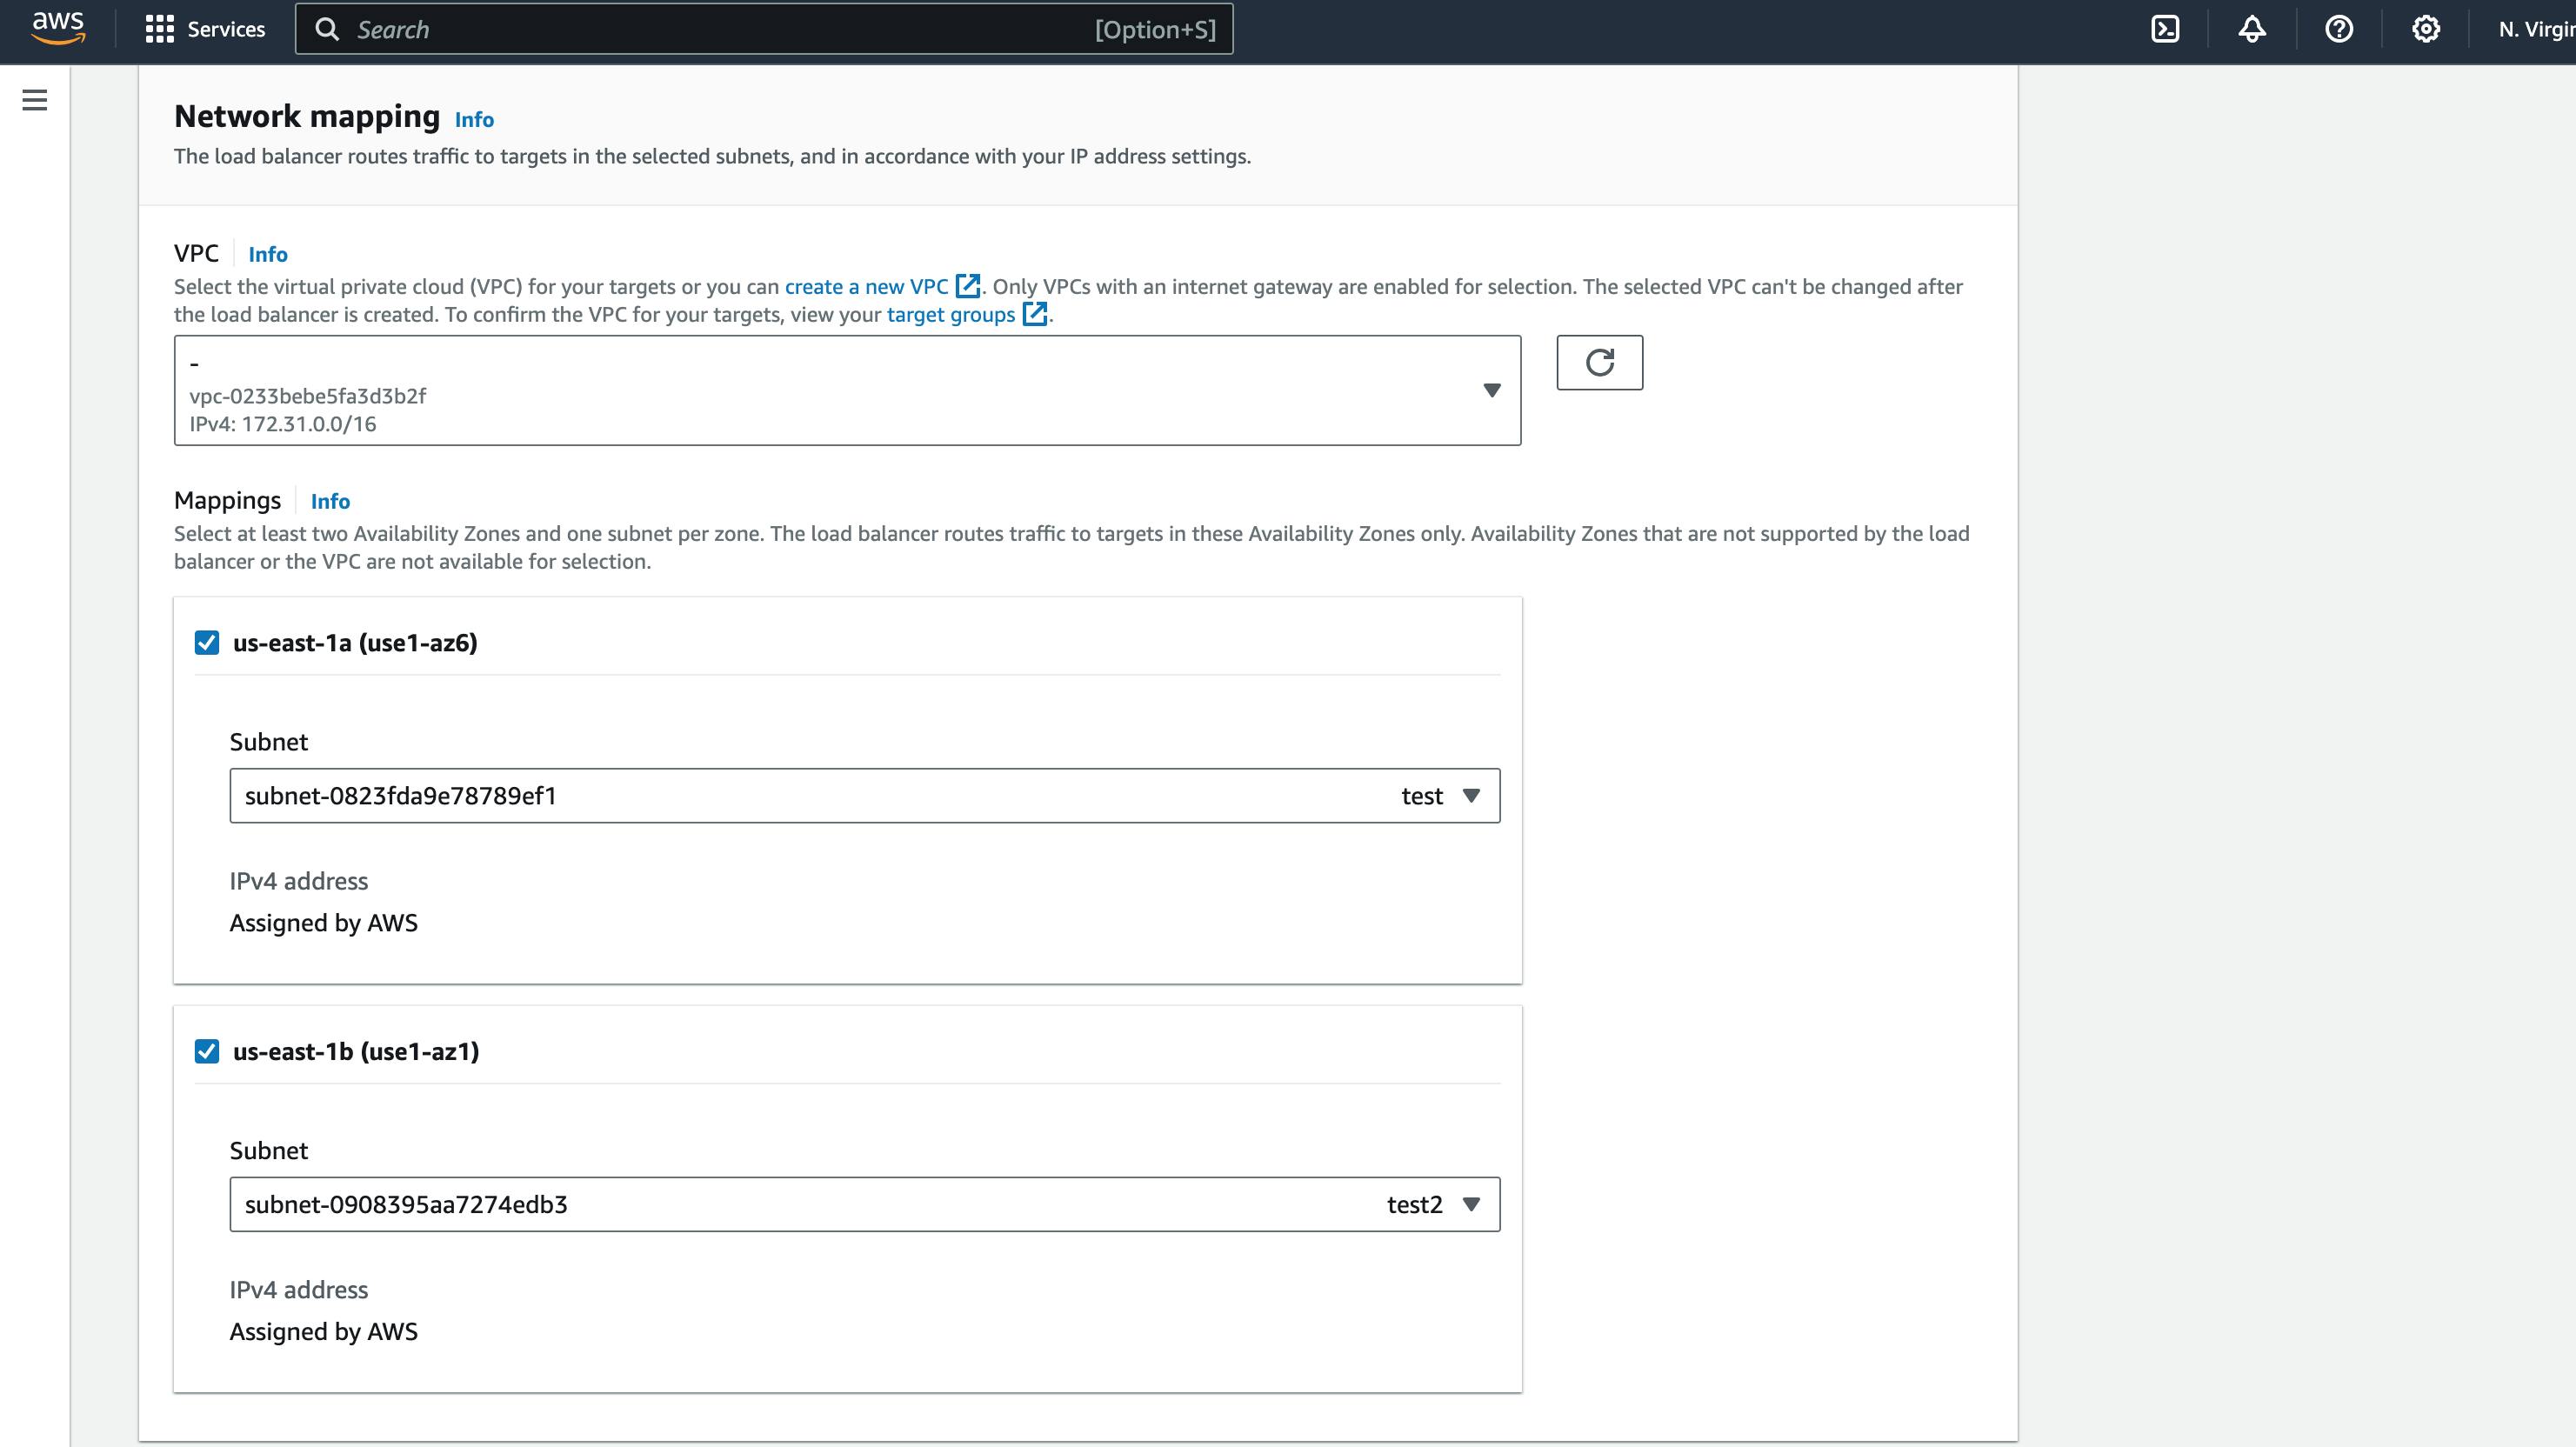
Select the subnets where the instances are deployed. For the test case, I deployed the instances to two subnets in different availability zones.
Select the appropriate Security Group which allows HTTP, HTTPS and the ports where the applications can be accessed.
Configure the listener by selecting the protocol, port, and target group. In our test scenario, we chose HTTP, port 8080, and target group 1. Ensure that the selected port matches the target group using the same port. Repeat this step for each target group you've created.
Finally, create the load balancer.


With the load balancer created, ensure the applications are reachable using the load balancer URL and application port. In my setup, I can access them via:
http://test-299301787.us-east-1.elb.amazonaws.com:8080/
http://test-299301787.us-east-1.elb.amazonaws.com:8081/
With my target groups and load balancer resources in place, it's important to note that the URLs mentioned earlier cannot be directly used in an A-record within Route53. To obtain suitable URLs for A-records in Route53, I'll be associating the mentioned URLs with two separate CloudFront distributions.
To set up a CloudFront distribution, you can search for the CloudFront service within AWS.

Select "Create distribution".
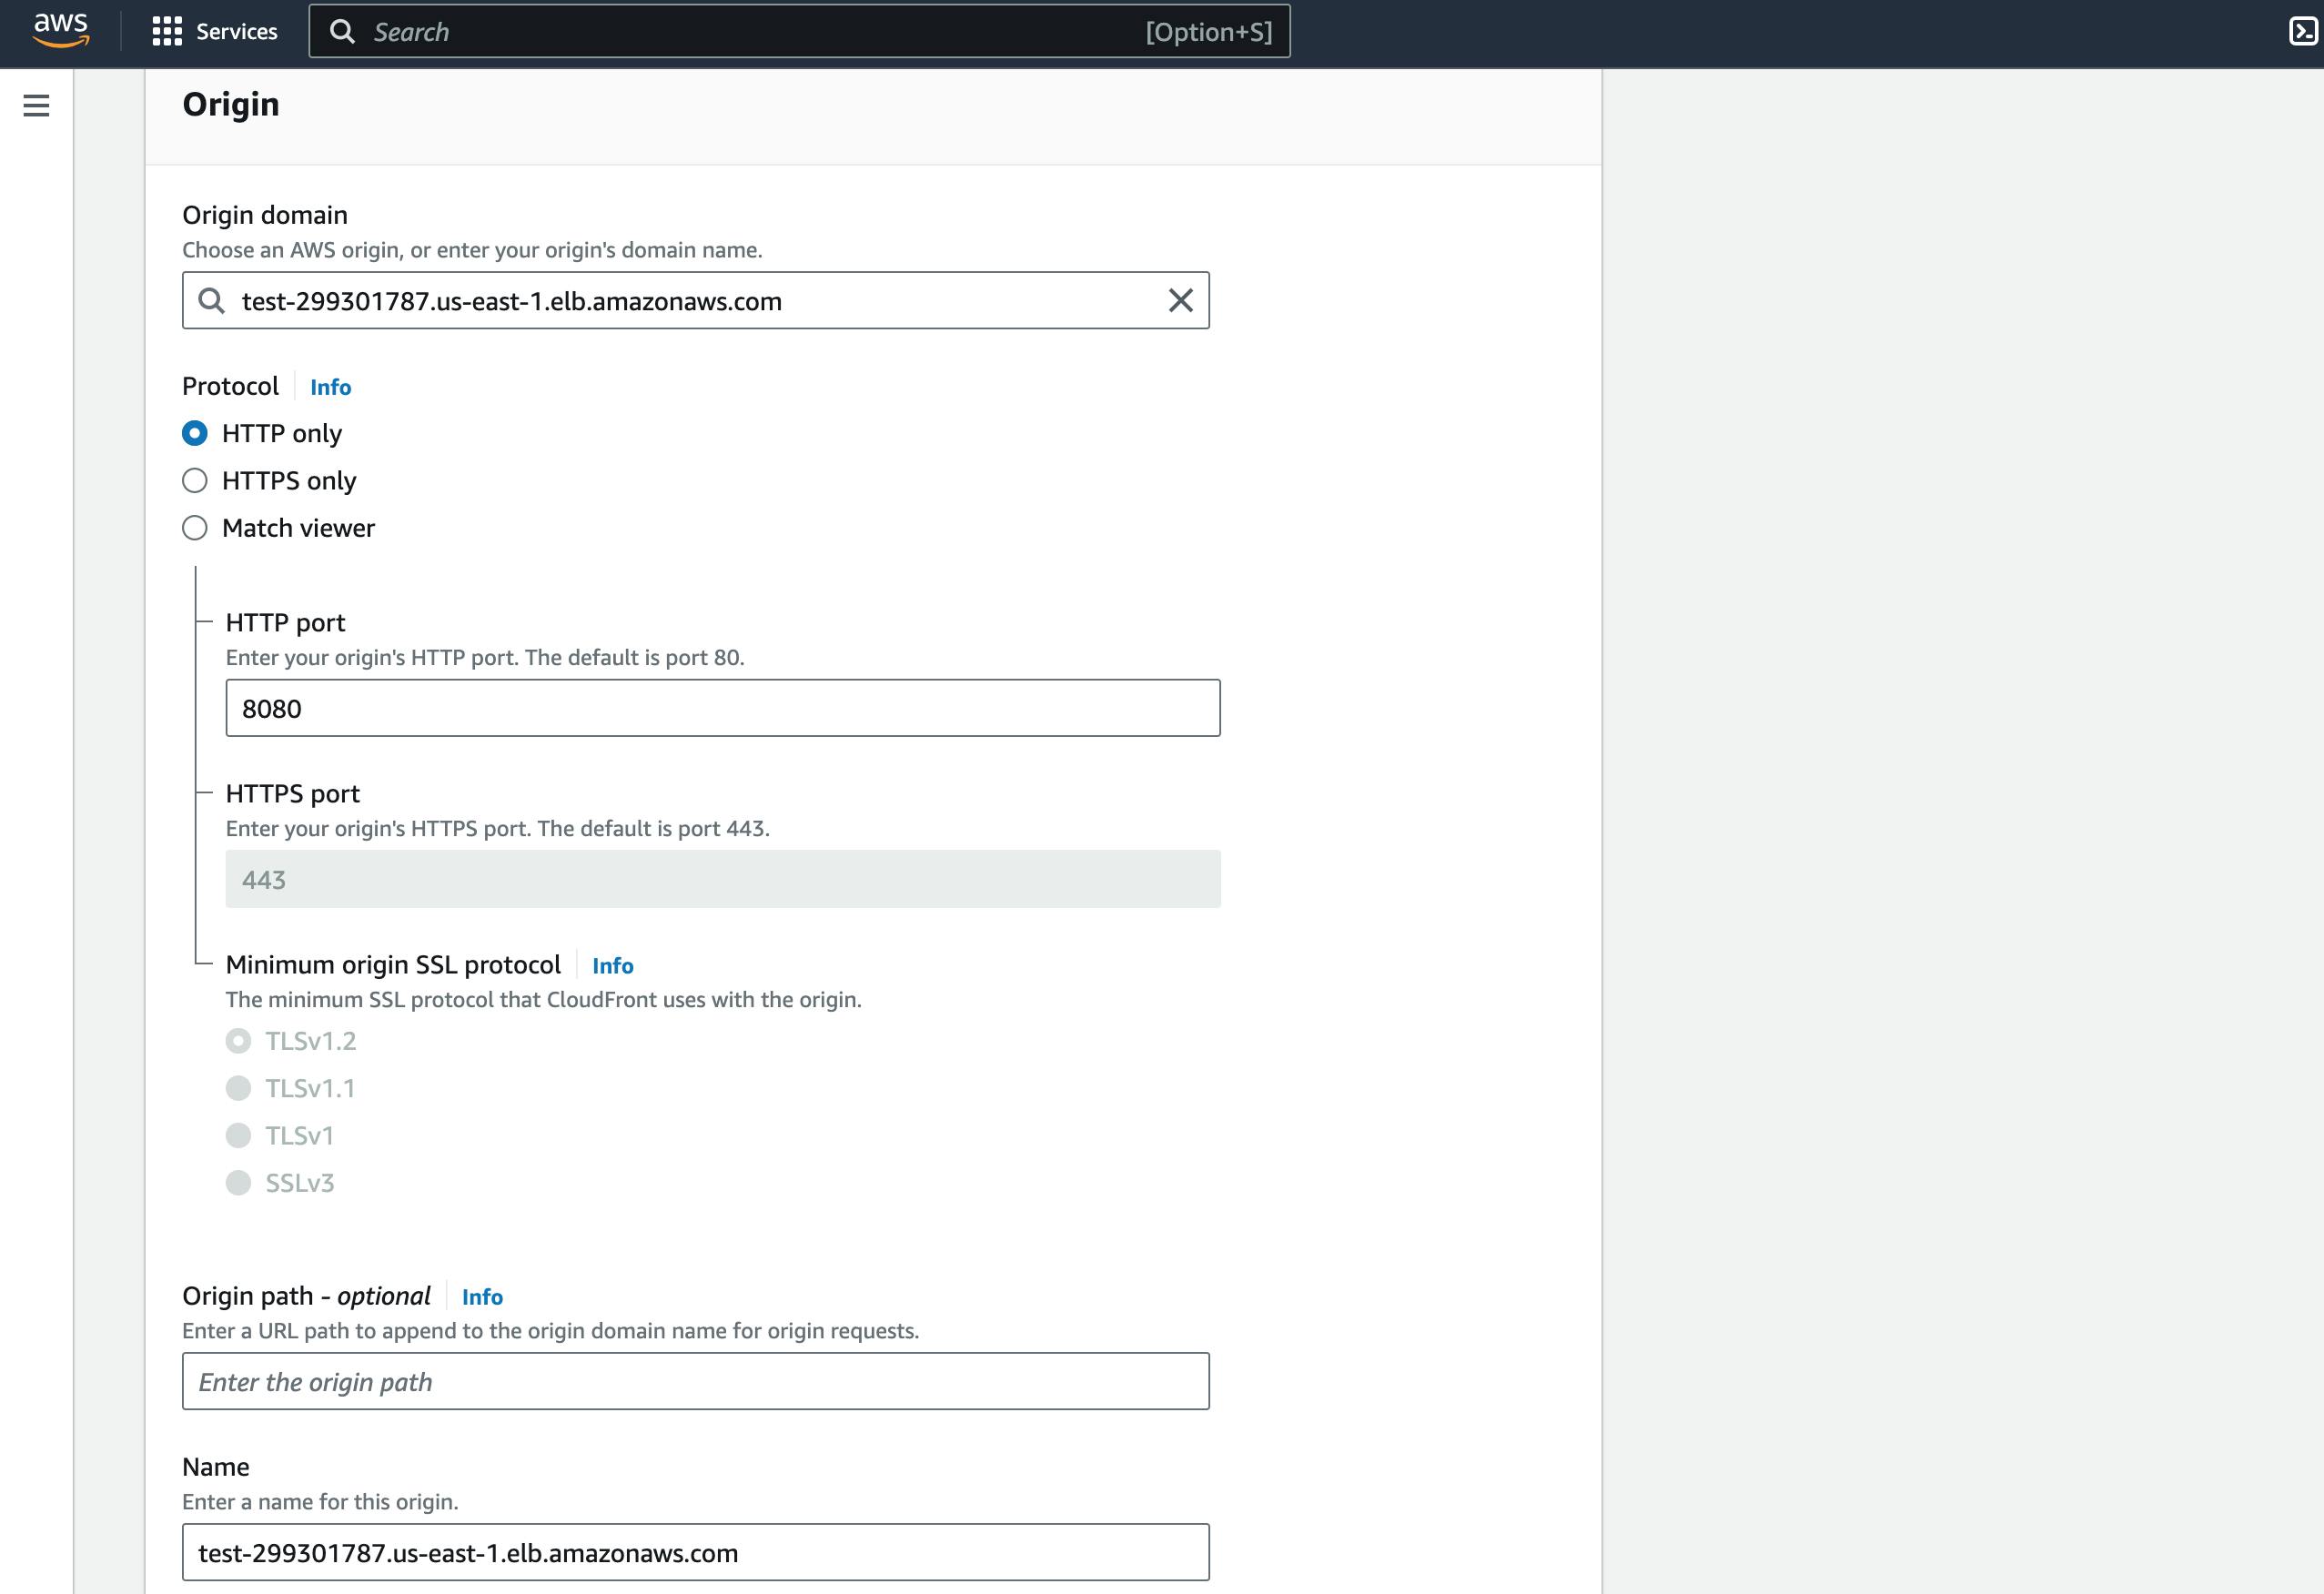
Select the created load balance as the Origin domain.
Select HTTP and input the service port in the HTTP port. In my test case; 8080.
Change the name of the CloudFront distribution if you wish.
Select the caching method you want.
Select your ACM or import your custom certificate in Custom SSL certificate.
Add the subdomain you wish to use to reach this service as an "Alternate domain name(CNAME)". In my test case, I used test2.achebeokechukwu.space .
Create the CloudFront distribution.
Repeat the same process for other ports.


Hello there! I appreciate your continued engagement in this process. We're almost there! Now that our CloudFront distributions are set up and ready to go, the next step involves creating A-records in the hosted zone of the desired domain name in Route53.
We assume that you've already created a hosted zone for the domain name you intend to use in Route53. If you haven't done so yet, you can find detailed guidance on setting up a hosted zone by checking out this.

To create the A-record for the created CloudFront distributions
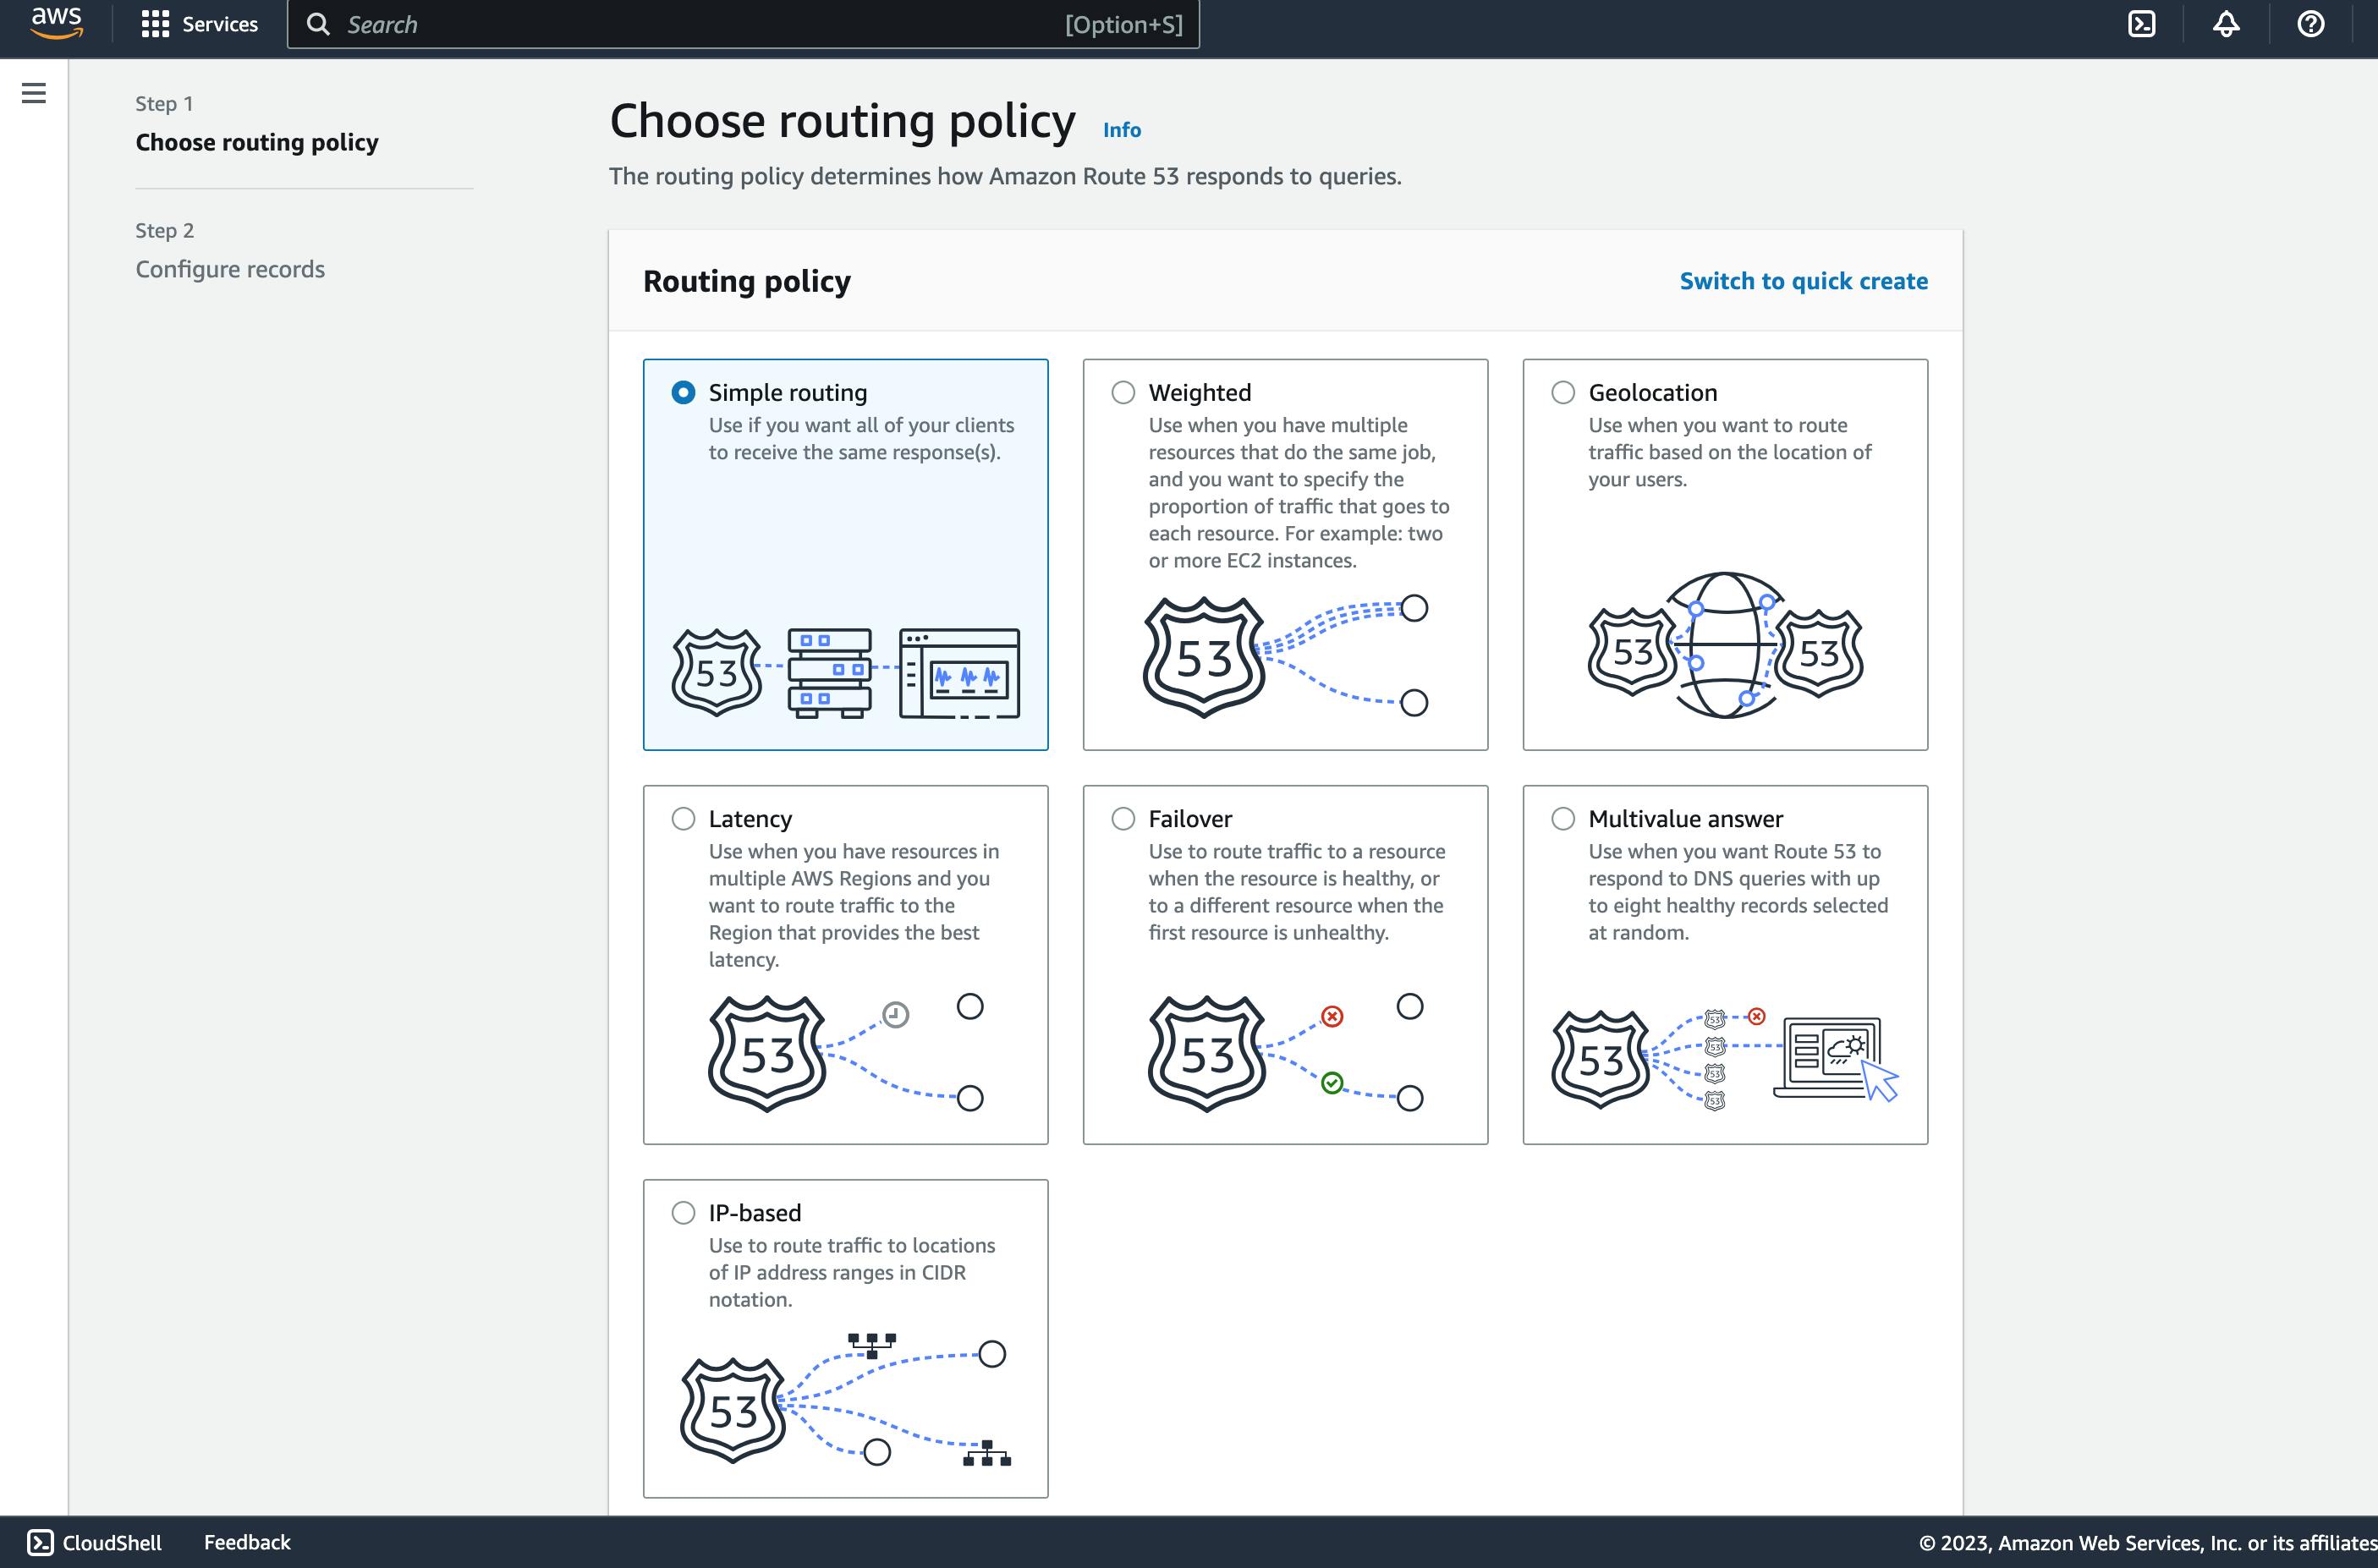
Select "Create record".
Select "Simple routing".
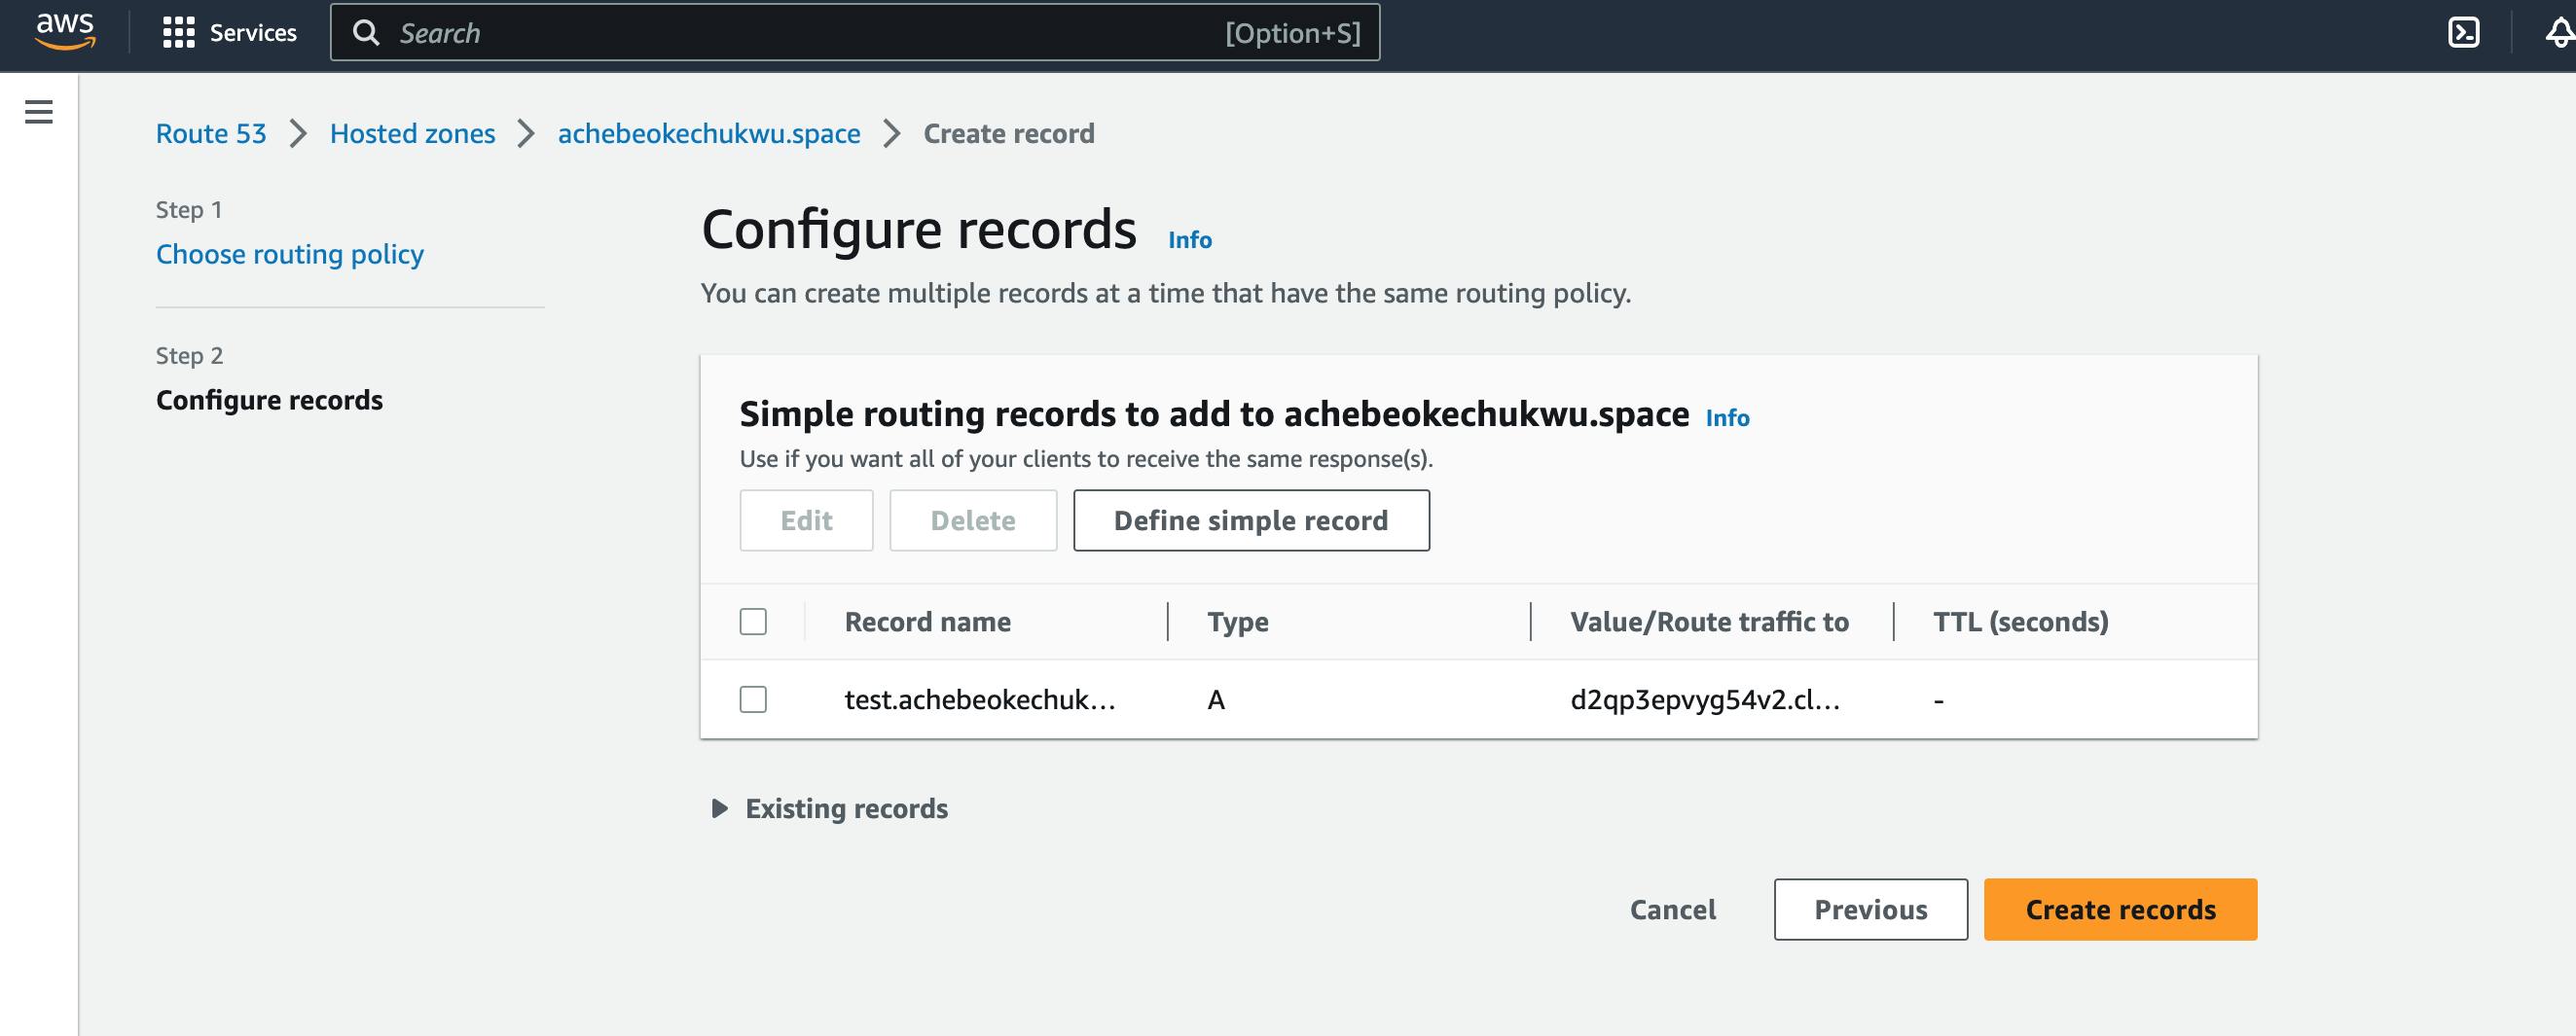
Define simple record.
Input subdomain, this should be the same as what is the CloudFront alias.
The record type is set to A.
Select "Alias to CloudFront Distribution" as Value/Route traffic to.
Select the CloudFront URL that pops up, if it doesn’t then the selected subdomain doesn’t match what is in the CloudFront’s alias.
Click "Define simple record".
Click "Create record".
Repeat the same process for other subdomains.


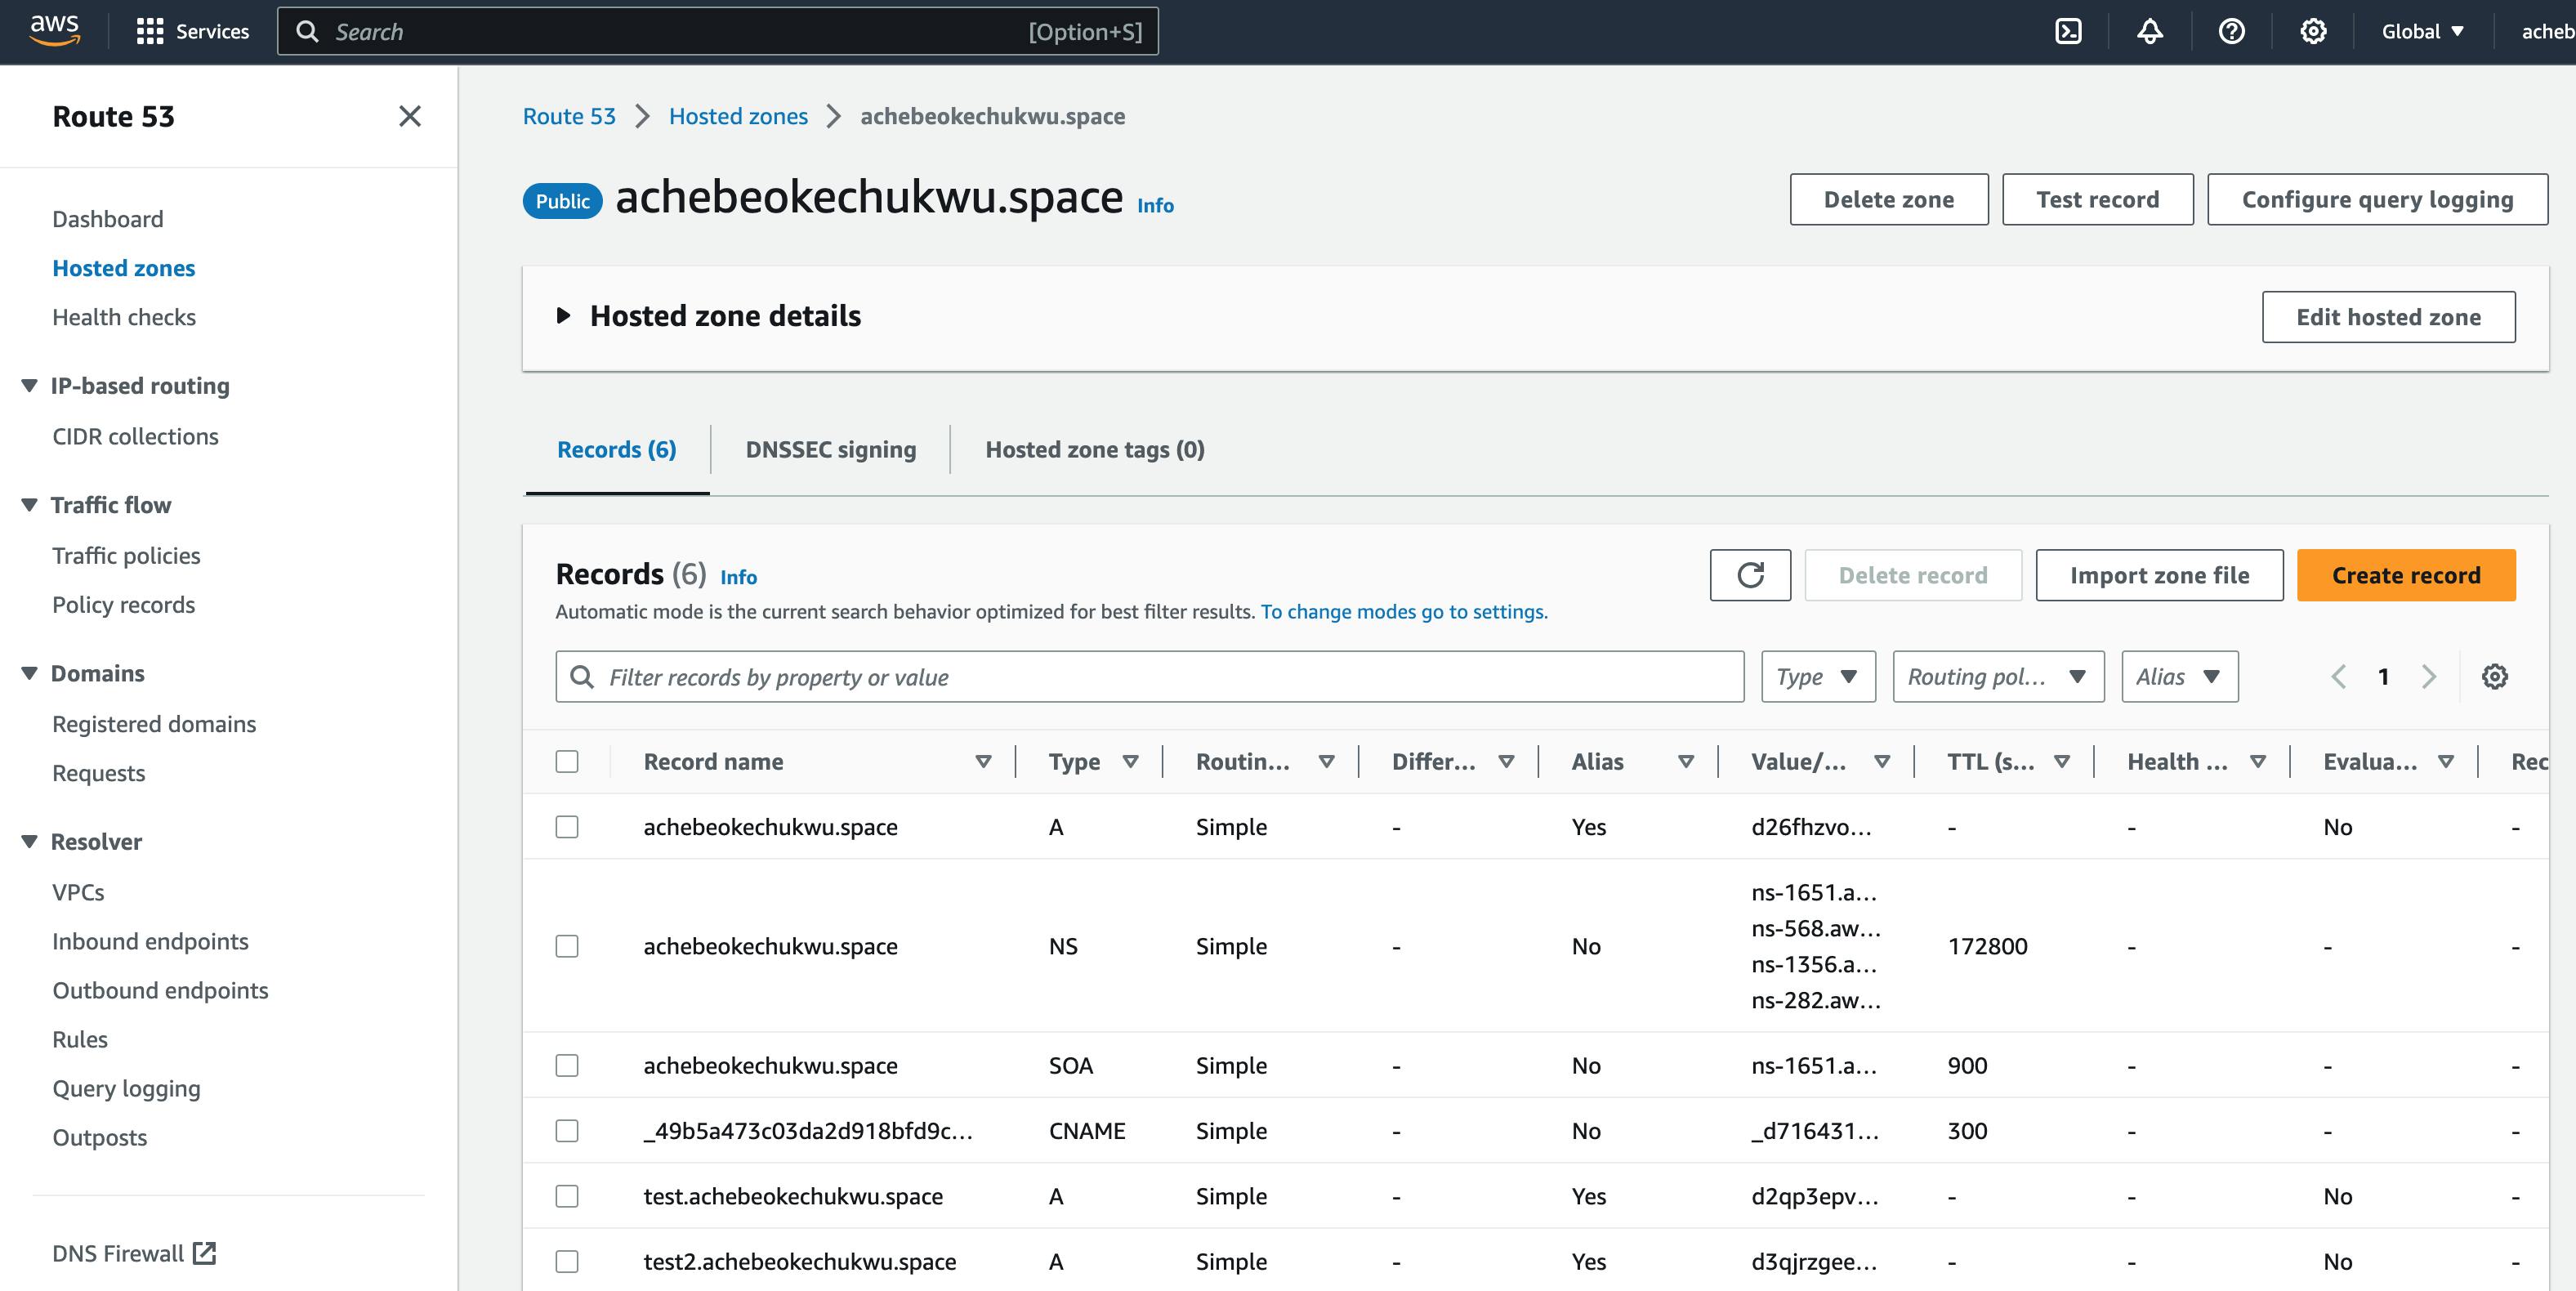
If the above processes are well followed, you should be able to reach the docker application using the subdomain defined. In my setup, I can access mine by using:
test.achebeokechukwu.space
test2.achebeokechukwu.space
By successfully making your applications accessible via the defined subdomains, you've accomplished the main goal of this article. I'm delighted to have guided you through this journey.
Thank you for investing your time in reading this article. I'm Achebe Okechukwu, currently exploring opportunities in Cloud Engineering and DevOps roles. For further information and to explore my work, please feel free to visit my GitHub profile using this link. If you'd like to get in touch, you can reach me at oachebe2022@gmail.com.